Introducing 0.96 inch OLED Display
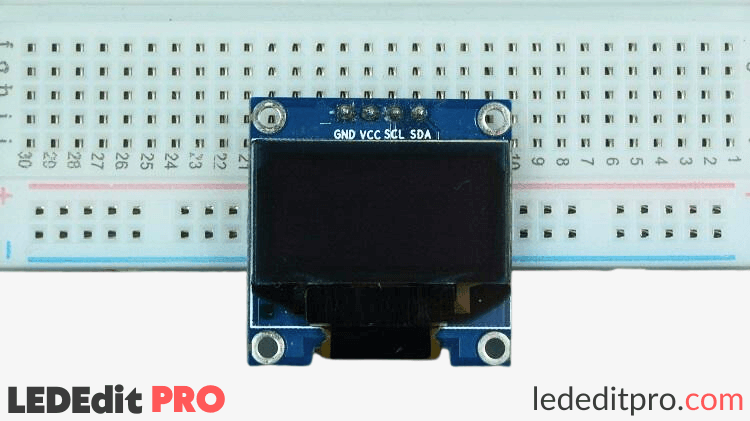
The SSD1306 model, a mono color, 0.96-inch display with 12864 pixels, is the OLED display that will be used in this tutorial, as shown in the following figure.
Because the OLED display does not require backlighting, it results in a very nice contrast in low-light conditions. Furthermore, since its pixels use energy only when they are turned on, the OLED display consumes less power than traditional displays.
The model we're using has four pins and uses the I2C communication standard to interface with any microcontroller. There are models that communicate using the SPI communication protocol or that come with an extra RESET pin.
OLED Display SSD1306 Pin Wiring
The wiring is very simple since the OLED display uses the I2C communication standard. You may refer to the following table as a guide:
Pin: ESP8266
Vin: 3.3V
GND: GND
SCL: GPIO 5 (D1)
SDA: GPIO 4 (D2)
To wire the OLED display with ESP8266, you may instead follow the next schematic diagram.
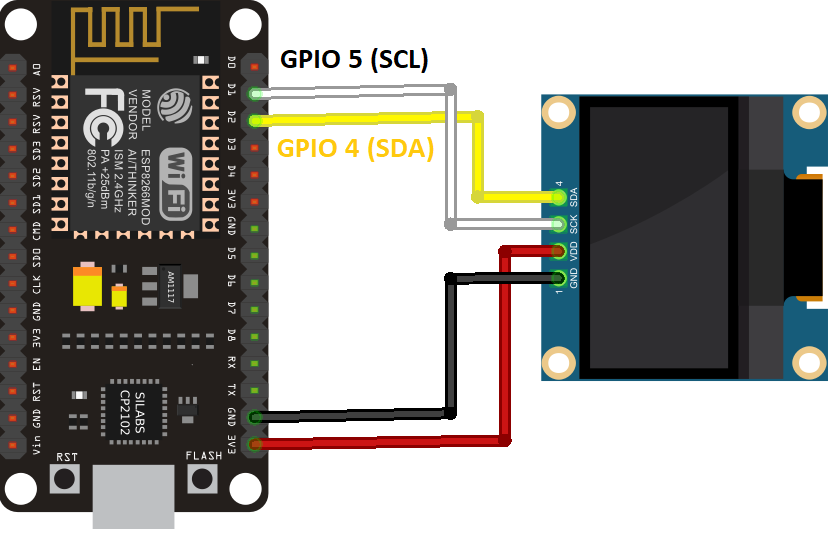
We're using the I2C communication protocol in this example. The ESP8266's most suitable pins for I2C communication are GPIO 5 (SCL) and GPIO 4 (SDA).
Use the following GPIOs if you're using an OLED display with the SPI communication protocol:
- GPIO 14: CLK
GPIO 12: MISO
GPIO 13: MOSI
GPIO 15: CS
Installing SSD1306 OLED Library – ESP8266
To control the OLED display with ESP8266, numerous libraries are available. We'll be using two Adafruit libraries in this tutorial: the Adafruit_SSD1306 library and the Adafruit_GFX library.
To install such libraries, follow the next steps.
1. Open your Arduino IDE and go to Sketch > Include Library > Manage Libraries. The Library Manager should open.
2. Type “SSD1306” in the search box and install the SSD1306 library from Adafruit.
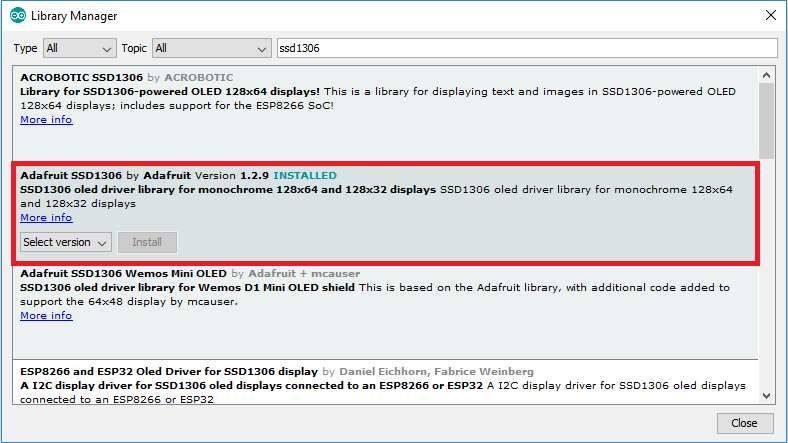
3. After installing the Adafruit SSD1306 library, type “GFX” into the search box and install the library.
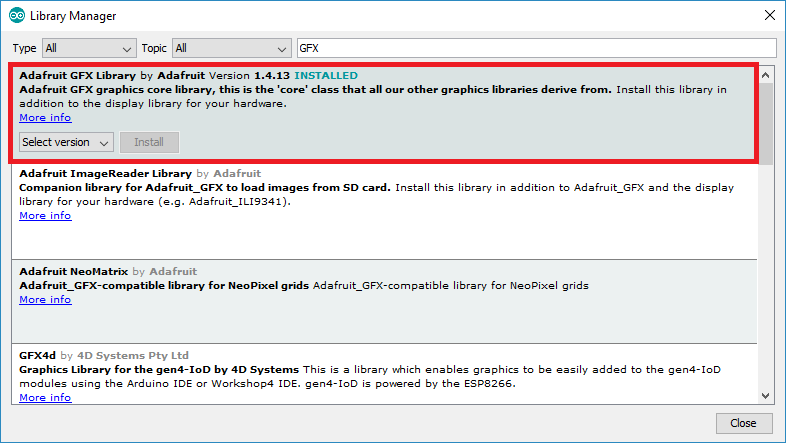
4. After installing the libraries, restart your Arduino IDE.
The ESP8266 will be programmed using the Arduino IDE, so you must have the ESP8266 add-on installed in your Arduino IDE. Follow the next tutorial if you haven't already:
Install ESP8266 Board in Arduino IDE in less than 1 minute
Testing an OLED Display with ESP8266
You may use one example from the library to see whether everything is working correctly after wiring the OLED display to the ESP8266 and installing all required libraries.
Go to File > Examples > Adafruit SSD1306 in your Arduino IDE and select the example for the display you're using.
Learn more about it on LEDEdit PRO
How to Wire an OLED Display with ESP8266 NodeMCU